
1) Adding photos from the Mobile App
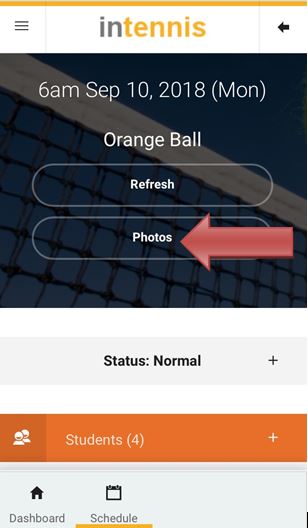
From a session, coaches can upload photos.
Select “Photo” which will bring you to an upload screen.
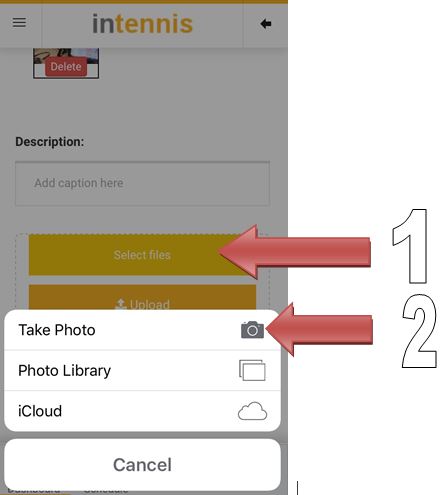
Tap ‘Select Files’, to add photos from your Photo Library or to Take a Photo. Add in a short description. Repeat process to add more photos.
Finally, Select “Upload” to upload all the photos. Now, students in that class should be able to see the uploaded photos in their customer portal.
Note: small photos less than 200px x 200px are not supported. For best results, keep the aspect ratio as 4:3 (they will be all trimmed/scaled down automatically).
2) Viewing all photos from the Mobile App
Select Photo from the dashboard to view all listed photos. Admin/Coach can delete photos from here. Deleted photos won’t be shown in the customer portal.
Note: at the moment, all uploaded photos are shown here, regardless who uploaded them
3) Viewing photos on the Customer Portal
After logging in to the customer portal, click on photos (top right corner) to view the class photos in a gallery.